To get the most value out of Google Analytics, you need to customize it for your business. That means, you need to add goals that matter to your business so the data is meaningful and specific to you. You need to be able to measure metrics that matter. Let’s go over how to set up a goal in Google Analytics so you can make data-driven decisions.
This information is all specific to the Universal Analytics version of Google Analytics. There is now a newer version, GA4. In GA4 the concept of goals is re-worked. GA4 tracks every single item as an event. And in GA4, instead of goals you can set any event as a conversion. There is no limit of how many conversions you can track and it’s as simple as toggling an event as a conversion. The rest of this article focuses entirely on the goals system within Universal Analytics.
Why do Goals Matter in Google Analytics?
Before we dig into how to configure goals, let’s take a minute to discuss why it matters. Setting up goals allows you to customize the data and reports to fit the needs of your website. It allows you to get a more complete picture.
With goals, you can not only see if your website is getting traffic, but if that traffic matters. Are the visitors the right visitors? Do they play your embedded videos? Do they sign up for your newsletter? Do they share articles with friends? Have they created an account?
Without understanding and tracking your goals in Google Analytics, the metrics are vanity metrics. They don’t tell a complete story. You can use them to brag, but you can’t make meaningful decisions because you aren’t sure what is moving the needle.
What Kind of Goals Should You Track?
Goals should be metrics that grow your business. Just because you want to track something, doesn’t necessarily mean it should be a goal. It’s great to add events and track everything you can. Reserve your goals to track metrics that move the needle for your business.
Some of the items you may want to add as goals are:
- Form submissions or leads
- Account signups
- Newsletter signups
- Downloads
- Video or podcast plays
You’ll want to track both macro and micro goals. The macro goals will be the goals that directly affect your primary business objective. They are what you typically think of when thinking of your goals. These are things like getting leads, payments, and new signups.
Micro goals are sometimes harder to identify but also important. These are goals that play a role in the overall conversion process. These are small conversions that move people closer and closer towards completing a macro goal. These are things like newsletter signups, downloads, and clicking play on an embedded video or podcast.
How Many Goals Should You Have?
Google Analytics allows you to track up to 20 goals. You don’t need to use all 20 slots though. Just track the right amount of goals for your business.
First, try to identify your primary business goals. Then, identify the metrics you can measure and track those goals. The specific number of goals will vary depending on your website and business.
Google Analytics separates the goals into 4 sets with up to 5 goals per set. When you add your goals, make sure to group your macro goals and micro goals in separate sets. You can organize your goals however they make sense for your business. You’ll be able to view the report data by set. So, your data will make the most sense if you organize your sets with related or similar goals.
Where Do You Configure Goals in Google Analytics?
To access the goal configuration settings, click the Admin gear icon in the lower left of your Google Analytics account. Then under the View panel (the list on the right hand side), click Goals. Click on the red New Goal button at the top and you’ll be ready to add your goals!
How to Set Up Google Analytics Goals
When you go to add a new goal, you may see a list of templates. If you’ve selected an industry category for your Google Analytics profile, then they provide a handful of customizable templates.
Though this seems helpful, it’s generally easier to just start from scratch. So, if you don’t see templates, don’t worry about it. If you do see templates, scroll down to the bottom and select Custom. Then just continue on to the following steps.
There are four different ways to track goals in Google Analytics. You can track goals by destination, duration, pages per visit, or events. Let’s dig into why you would use the different goal types and how to set them all up.
Destination (URL) Goal
This type of goal allows you to specify a URL as the trigger. So, when a user accesses a particular page on your website it registers as a completed goal.
This is useful for thank you pages and confirmation pages that people view after they’ve submitted a form, registered, or made a purchase. This goal type is the most common. It’s often used to track your macro conversions.
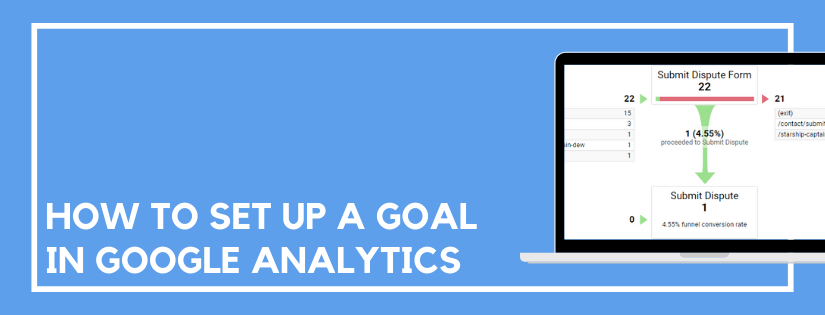
This type of goal is also nice because it allows you to set up a funnel. Funnels need a URL for every step, so this is the only goal with the option. A funnel allows you to visually identify if there is a particular step where the majority of people are leaving the conversion process.
The funnel is only useful if a specific path is required. If not, people will come in and out of the funnel often and it will be difficult to make sense of it.
How to Add a Destination Goal:
- Enter a name for your goal in the Name field.
- Select the Goal slot ID. Remember to group similar goals in similar sets. You don’t have to use sequential goal IDs.
- Click Destination as the Type and click Continue.
- In the Destination field, you’ll see a drop down and a text field. Start with the text field and enter in the URL you want to use to trigger when this goal completes. So, if you are tracking form submits, and your form goes to
thank-you.htmlafter the submit button is clicked, you will usethank-you.htmlas your destination URL in this field. - Next, look at that drop down to the left of the URL text field. This is how you’ll choose a match type for the URL. The options are Equals to, Begins with, or Regular expression.
- If the URL you used is always the same then choose Equals to.
- If the URL you used sometimes has parameters at the end of it, and those parameters change, choose Begins with. Most likely, if the URL has parameters you will see something like
thank-you.html?id=1&kw=none. In that case, the URL is stillthank-you.htmland that is what you would have in your text field, but the match type would need to be Begins with so this URL would trigger the goal as well asthank-you.html?id=2&kw=something. - If matching the URL is more complicated than the first two scenarios, you’ll need to choose Regular expression. If you’re not already familiar with regular expressions, this may be a little more than you want to dig into because it is an advanced setting. Instead, you may want to figure out if you can make multiple goals to accomplish the same task.
- In the Destination section you will also see a Case sensitive checkbox. Check this if you want your goal URL to only trigger when the cases are an exact match.
- If there is a dollar value associated with your goal, you can switch Value to On and add it.
- If Ecommerce Tracking is set up, you can leave this turned off and the monetary values will show up under the Ecommerce reports.
- If this goal requires a specific series of steps to be followed you can enable the Funnel.
- This allows you to add up to 10 steps that a user must go through before reaching the goal. This allows you to see where users are leaving the funnel.
- The match type of the funnel URLs will use the same match type as your primary goal URL.
- When finished click Verify this Goal to ensure it looks accurate. Then click Save.
Duration (Time) Goal
I’ll just start off by saying that this goal is not useful very often. It allows you to set a length of time on the site as a goal. For the goal to trigger, a visitor has to spend more time than the goal length.
There are two main reasons why this goal is not useful. First, if a user spends a long time on your site there is no guarantee that they are spending time productively. There could be user experience problems and they are unable to navigate to the page they are looking for.
The other problem is that Google Analytics can’t measure time very accurately. The length a visitor is on a page or the site can only be calculated if there are multiple page views. So, if a user views one page and leaves, or if a website only has one page, Google will show the time spent as 0 minutes and 0 seconds regardless of the actual time spent.
How to Add a Duration Goal:
- Enter a name for your goal in the Name field.
- Select the Goal slot ID. Remember to group similar goals in similar sets. You don’t have to use sequential goal IDs.
- Click Duration as the Type and click Continue.
- In the Duration section, enter in the length of time you want someone to spend on the site before it triggers the goal.
- If there is a dollar value associated with your goal, you can switch Value to On and add it.
- If Ecommerce Tracking is set up, you can leave this turned off and the monetary values will show up under the Ecommerce reports.
- When finished click Verify this Goal to ensure it looks accurate. Then click Save.
Pages Per Visit Goal
Very similar to the duration goal, this is another goal type you probably won’t use. Although this can be useful to track support sites, there will probably be a better goal type you can use to track more accurately.
Pages per visit is not a useful goal type because it focuses on quantity instead of quality. Just because someone visited a ton of pages on your website, doesn’t mean it was a good experience. They could have had issues navigating and locating the content they wanted to find.
How to Add a Pages Per Visit Goal:
- Enter a name for your goal in the Name field.
- Select the Goal slot ID. Remember to group similar goals in similar sets. You don’t have to use sequential goal IDs.
- Click Pages/Screens per session as the Type and click Continue.
- Enter in the number of pages you want someone to surpass before the goal can trigger.
- If there is a dollar value associated with your goal, you can switch Value to On and add it.
- If Ecommerce Tracking is set up, you can leave this turned off and the monetary values will show up under the Ecommerce reports.
- When finished click Verify this Goal to ensure it looks accurate. Then click Save.
Events Goal
The last goal type is to track events. Events are very useful to track interactions on your website such as button clicks. Then, Google Analytics makes it easy to add those events as goals. If the goal you want to track on your website isn’t associated with a URL, events are the next best option.
This is a great option to track items like video plays or form submits that don’t load a new page.
How to Add an Event Goal:
- Enter a name for your goal in the Name field.
- Select the Goal slot ID. Remember to group similar goals in similar sets. You don’t have to use sequential goal IDs.
- Click Event as the Type and click Continue.
- In the Event conditions section, you can enter in one or more of your event parameters to target the event(s) that should trigger this goal.
- You can enter in a category, action, or label. You can choose if you select the event based on one, two, or all of those attributes. You can even choose the match type (Equals to or Begins with).
- You can also target the event by value. You can enter in a value and specify if it is greater, less than, or equal to that value.
- For the value of an event goal, the default action is to use the value already associated with the event. You can however toggle that option to No and enter in a different value to use for the goal.
- When finished click Verify this Goal to ensure it looks accurate. Then click Save.
Verify Your Goal
Google Analytics provides an easy way to verify your goal. All you do is click the Verify this Goal link and you will be able to see if the goal has triggered in the last seven days. This is just a test to confirm it’s configured correctly, this does not predict how well the goal will perform.
If it shows there are no goal completions in the last seven days it may still be set up correctly. Go find the data in your reports that you’re trying to set up as your goal. Do you see any results for the last week or is zero the correct response?
If your goal looks too high you’re likely collecting data from more pages than you intended. Take a look at your URL match type.
You can also use the Realtime reports to make sure the goals are working properly. Go to Realtime > Conversions > Goal Hits to view your goals triggering in real time. If you run a test yourself, I’d recommend running it on a mobile device with wifi turned off. That way, your IP won’t be filtered out of your analytics data if you’ve enabled internal IPs to be filtered out.
What Else Should I Know About Google Analytics Goals?
There are a few other things you should be aware of when it comes to goal in Google Analytics.
Data collection starts when the goal is created. Historical data from before the goal was set will not be included in the goal data.
You can edit goals. You will be able to go in and modify everything about your goals even after they start gathering data. Your edits will only change the future data, not historical data.
You can disable goals. If a goal becomes irrelevant, you can disable it. They can not be deleted but you can disable or edit it.
Where Do You View Goal Data in Google Analytics?
There are a couple of different reports where you will be able to review your goal data in Google Analytics.
The primary goal reports are found under Conversion > Goals > Overview.
However, several other reports in Google Analytics include goal metrics. For example, if you go to Acquisition > All Traffic > Channels you will see goal data included in that report. There is a conversion drop down menu on the right side of the data table that allows you to adjust the goal data in the report.
Tracking your goals in Google Analytics will allow you to take full advantage of the data it offers. It fine tunes the reports to meet the needs of your business. That way, you can use the data to make decisions and grow your business.
Do you want to listen to this article? Here’s the podcast episode: