Building a community on Facebook can be a powerful way to connect with your audience. Talking to people, understanding their pains and frustrations, can be beneficial for product development and growth of your company. But, eventually you get to a point where you want your Facebook fans to be able to easily connect with your website and subscribe to your list. You don’t want a 3rd party network, such as Facebook, to be your only route to talk to these people. That’s when you want to add a custom welcome tab on Facebook.
What the Welcome Tab Won’t Do
First, before we dig into how to add a custom Facebook welcome tab, let’s talk about the history of the welcome tab on Facebook. In the past, this has been an amazing feature. Unfortunately, a lot has changed and it simply does not do what it used to do.
It Won’t Be a One-Click Setup
It used to be that you can add a custom welcome tab by clicking one install button on a Facebook page to install an app. That is no longer the case. You can’t set it up with an app install. There is no option already in your Facebook page manager. You will need to use the Facebook developer tools.
It Won’t Be Editable in Facebook
You won’t be able to edit HTML directly within the tab on Facebook. Instead, you’ll need to have the page hosted somewhere and provide a secure (https) link to Facebook.
It Won’t Be the Default View
You can create a custom tab and you can rearrange where it appears in your list of tabs, but you can’t make it the default. The Facebook default home tab will remain the default and the very top in the list.
Way back when, you could make a welcome tab that was the default view for everyone that landed on your Facebook page. You could even create it as an incentive for people to like the page. They would see one image with an incentive, then after they click like the tab image would change to reveal a coupon. Those days are gone. That is no longer an option.
It Won’t Be an Option for Everyone
And lastly, the biggest change, not everyone will be able to add a custom tab. There is now a prerequisite that the page must have a minimum of 2,000 likes.
How I Got 2,000 Facebook Likes Using 1 Image
Okay, so the biggest hurdle to add a custom Facebook tab right now is the 2,000 page like requirement. For a big business, this is no big deal. But for a startup, a blogger, or a solopreneur who is new to social and still building their audience, this can be a difficult goal to reach.
My Facebook page had less than 100 likes. So, before I could create my custom tab I first needed to gain over 1,900 likes. To speed this up, I ran a paid ad.
These days I focus on organic efforts over paid efforts. So, my process was simple and could have been far more optimized. But, these are the steps I took.
Step 1: Get an Image that Creates Emotion
The first step is to find the right image. You need to capture attention. The best way to do this is with emotion. You can use an image that creates anger and fear or joy and delight. I decided to go with humor.
I wanted an image that would resonate with my desired audience. Something that a blogger trying to do their own marketing could relate to. And, ideally, something they would want to share.
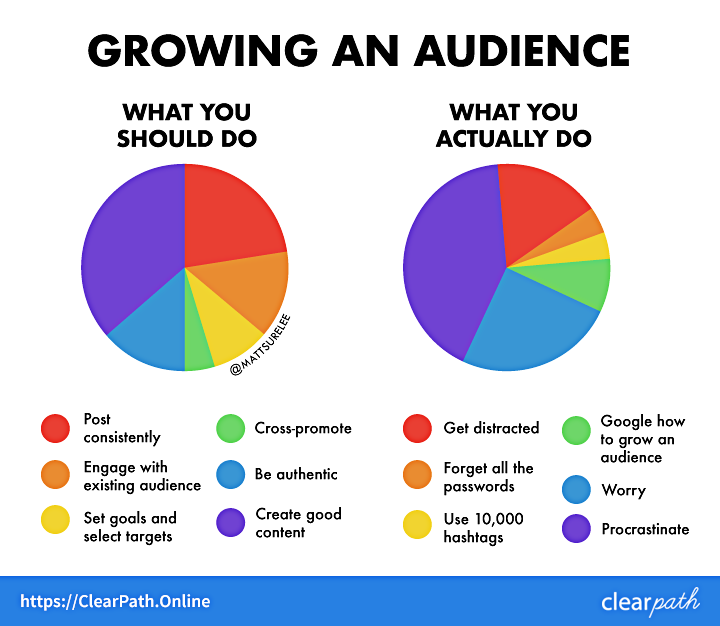
I decided to commission a chart by Matt Shirley. If you aren’t familiar with these charts, you should really check out his Instagram feed. He strikes a perfect balance between information and humor. Even though these charts aren’t factual, they are entertaining and often easy to relate to.
And for any marketer, whether a DIYer or a pro, charts and analytics are always an important and exciting part of the day. So, it seemed like a great fit.
I reached out, he pitched three brilliant ideas, we picked one and a week later I had my image.
Here it is:
Step 2: Target Your Audience
Okay, now that I had the perfect image to use in my ad, I needed to set it up on Facebook.
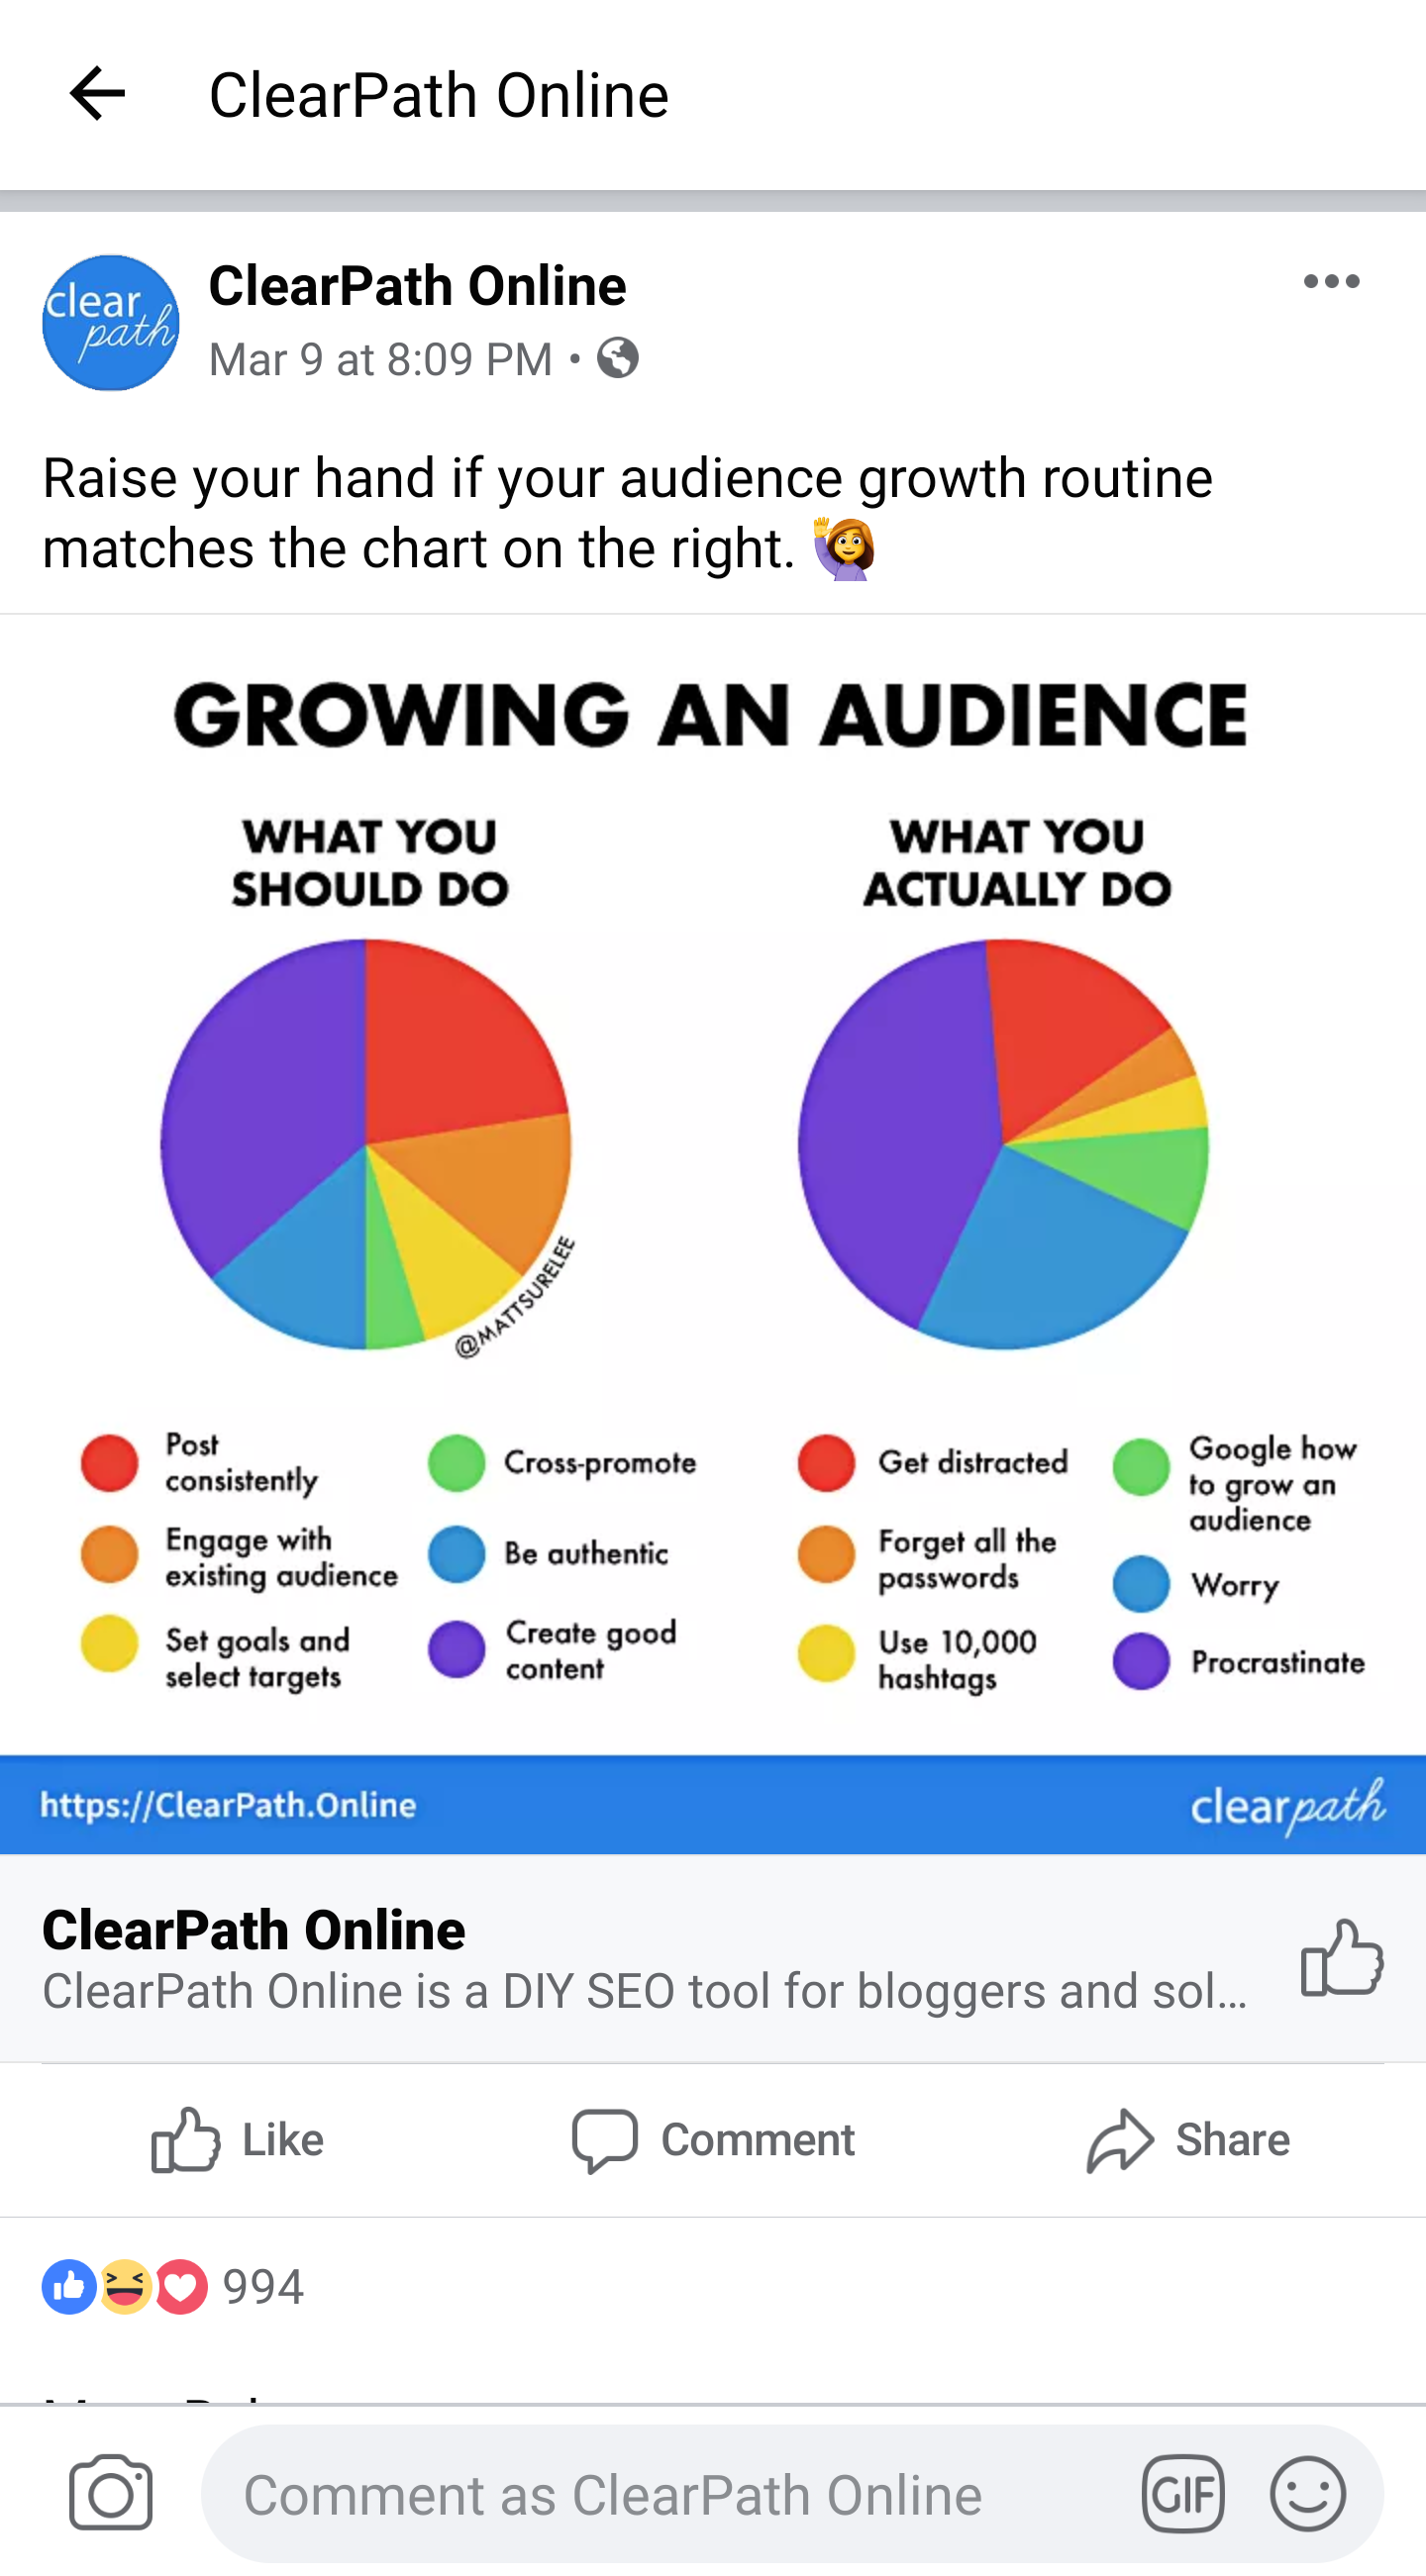
The ad itself was simple. I added my chart as the image. Then I wrote a small line of text. I wanted to encourage people to comment and engage on the post. So, I added text asking who could relate to the chart and put a raised hand emoji for myself.
The more difficult part was determining the best people to target. Now, you can keep the audience broad and the ad will be cheaper. That is not what I wanted to do though. Since I was already spending money on the ad, I wanted to reach the right people. I didn’t want my page to have 2,000 likes from the cheapest 2,000 people Facebook could find me. I wanted it to have 2,000 people that I have the potential of helping.
So, I limited my ad first by country. I targeted the United States, United Kingdom, and Canada. In Google Analytics I can see that these are the three countries that bring in the majority of my organic website traffic, so this made sense for my site.
Next, I restricted the ad by age. I know from my marketing personas what age range I’m targeting. So, I focused my ad on the age most likely to benefit from my product.
Lastly, I restricted the ad based on interests. I targeted bloggers, entrepreneurs, content marketers, affiliate marketers, and founders.
Step 3: Send Invites to People Who Like the Ad
Lastly, I engaged with people who engaged with my ad. I liked or replied to every comment. Sometimes both. To every single person who liked the post but not the page, I sent them an invite to like the page. Facebook makes this pretty easy. Just click to view the post likes and to the right of each name it will either say liked or it will have a button that says invite.
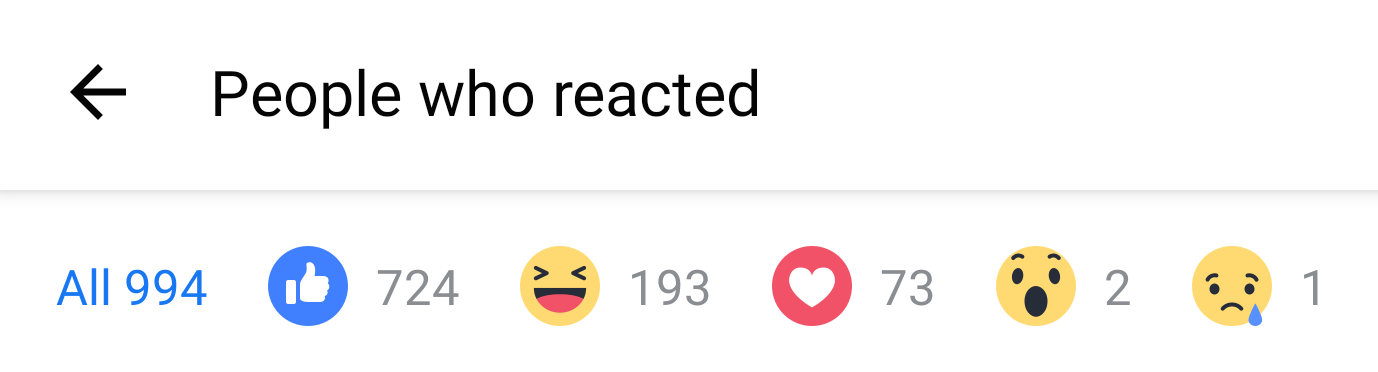
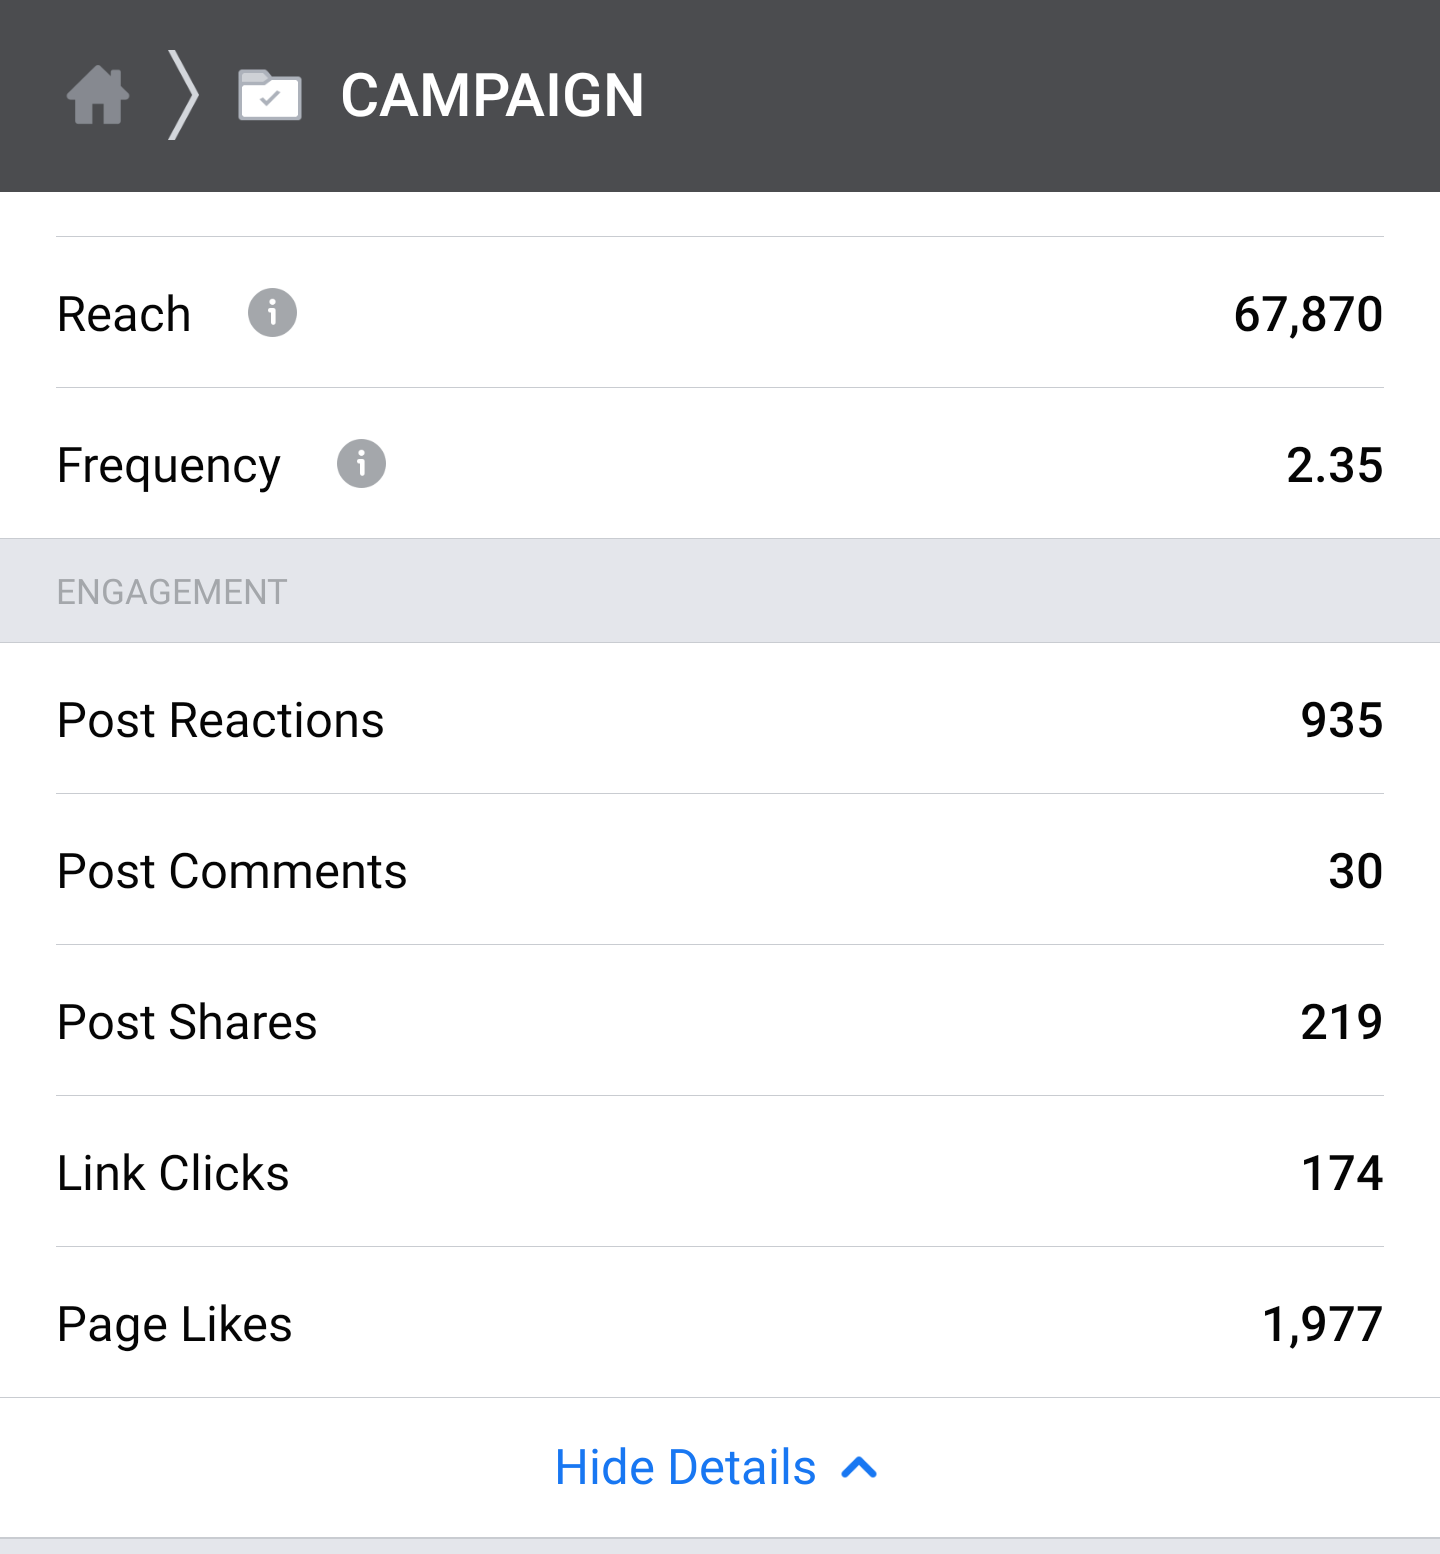
The post got 935 reactions, 30 comments, 219 shares and ended up getting me 1,977 page likes. It did its job. It was interesting, engaging, and people shared and liked it.
How to Create a Page in WordPress to Use as a Facebook Custom Tab
Once you have your 2,000 fans there is one other requirement you will need to deal with. You need a page to display the content you want to appear on your custom tab. Facebook is only going to allow you to give them a URL, so you need the page to live somewhere other than Facebook.
Adding a page to your existing website is going to be the easiest option since you already have that domain set up and hopefully secured with SSL. But, chances are you don’t want your standard website layout to appear on your Facebook tab. You probably don’t want your header or footer and the width constraints on Facebook are likely smaller than your standard website width.
You can hide those elements on a single page so you can use it as your Facebook tab content. I’ll explain how to do this for a WordPress website.
, create a new page and find the page ID. When you’re editing the page in the WordPress admin interface, the page ID will appear in the URL. At the end of the URL look for where it says post.php?post=. The 4 digit number that appears after post= is your page ID.
Next, preview the new page you are creating. Right click on the element you want to remove, such as the header. Click on Inspect. This will open the dev tools and allow you to view the code for specific page elements. This works in most browsers, I normally prefer to do it in Chrome.
Identify the class for the element you want to remove. If you have the element selected properly it should highlight the area when you hover over the code in the dev tools. In the code you’ll see class=. That will show you the class name(s). Copy that.
Then, in your WordPress admin interface, go to Appearance > Theme Editor. Go to your style.css file and add in a new style rule. You’ll take your page ID and your class that you copied from the element you want to hide and specify that it should not be displayed.
Here is an example of what the style rule would look like:
.page-id-1234 .navbar.navbar-inverse.navbar-fixed-top.affix-top {
display:none;
}
That says, on the page with the ID of 1234, for the navbar element with those particular classes, do not display it. That will hide the navbar only on page 1234.
Next, you need to go back to your page and add Facebook friendly content. Facebook specifies that the content should be a maximum width of 520 pixels and a maximum height of 810 pixels. To keep the content in those constraints you can add a div to the page, and then add all of your content within that div.
Here is what the div would look like:
<div style="max-width:520px;max-height:810px;">
… Your Content …
</div>
What to Put on Your Custom Facebook Tab?
What you put on your custom Facebook tab will depend on your goals and your brand. If you already have a lead magnet on your website, I’d start there.
If you have some kind of giveaway or freebie like a cheatsheet or free course that you use to get people onto an email list, add that to your custom Facebook tab. Embed your email subscribe form so people can sign up directly through Facebook. This will help you move your Facebook audience to a source you have more control over such as email.
How to Add a Custom Facebook Tab
Okay, so now we have our 2,000 fans and content we want to display on the tab. We can finally add our custom Facebook welcome tab. Here is how you add it:
- Go to https://developers.facebook.com/apps.
- Click Add a New App.
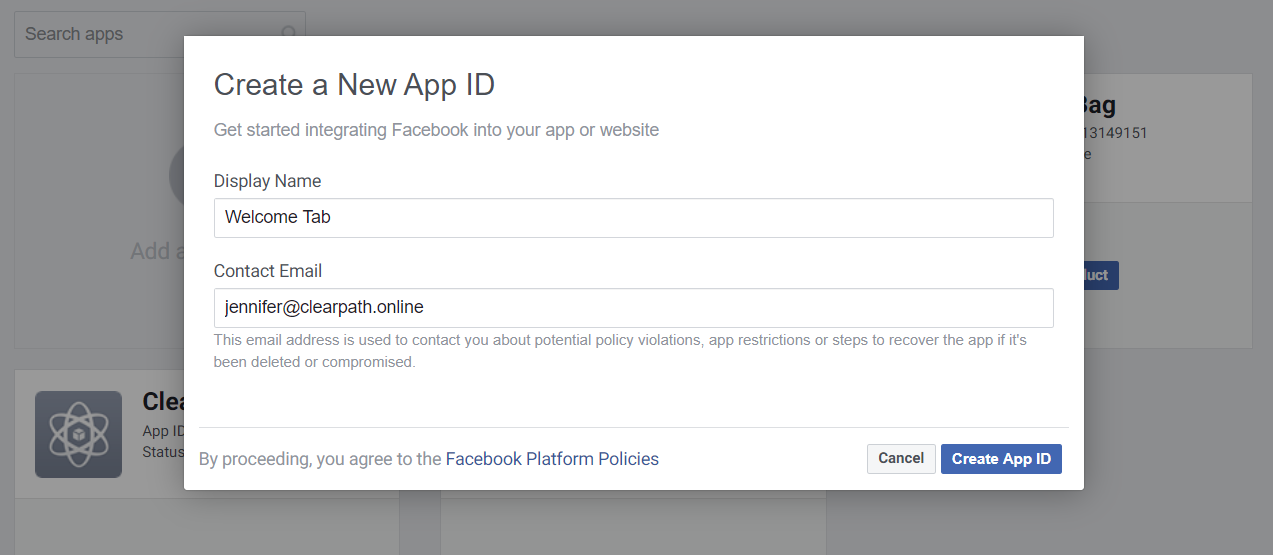
- Enter the Display Name (the name you want to use for your welcome tab app) and Contact Email. Then click Create App ID.
- Navigate to Settings > Basic and then scroll down to the bottom.
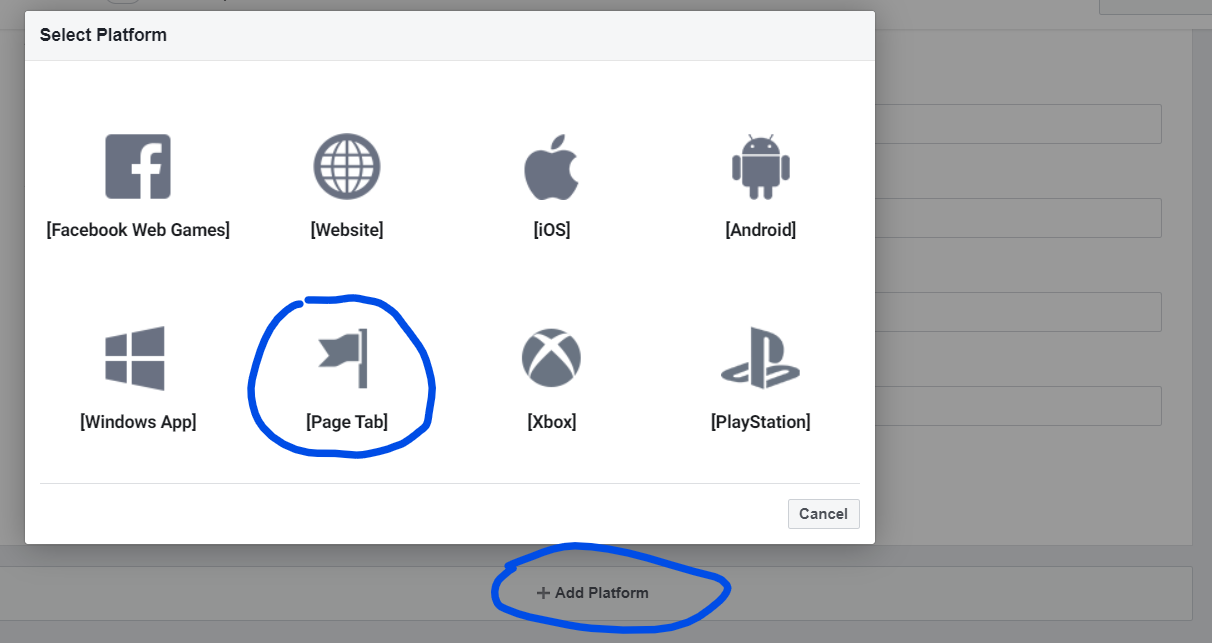
- Click Add Platform then click Page Tab in the box that appears.
- Then enter in the secure URL (https) you want to use for your page tab and the tab name.
- After you’ve entered in the details click Save Changes.
Now, the next step to actually implement the custom page tab app into your Facebook profile is not intuitive at all. I didn’t find any information from Facebook directly on how to do this, but I did find a very helpful article from Opace that explained the entire process.
To add the app to your Facebook page, you’ll need to copy and paste the following URL into a browser tab. You’ll replace the APP_ID and URL attributes with your own values.
http://www.facebook.com/dialog/pagetab?app_id=APP_ID&next=URL
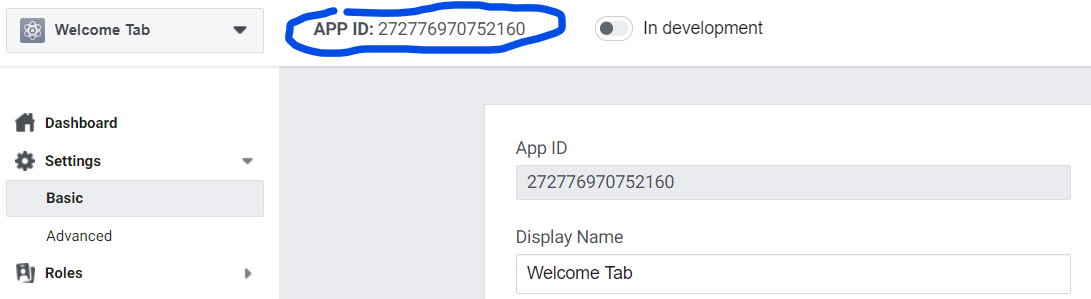
The APP_ID attribute will be found at the top of the basic settings panel.
The URL attribute is the secure URL you provided earlier as the page tab contents.
When you enter the URL with the appropriate attributes you will be taken to a page with a dropdown to select your Facebook page. Select the page you want to add the tab to and press Add Page Tab. That’s it, now it’s added to your page.
You can rearrange the tab by going to your Facebook page. Then navigate to Settings > Templates and Tabs. Scroll down and you will see all of the tabs for the page. You can drag to rearrange them.
Was it Worth it?
The short answer is no. The long answer is it depends.
I’m glad I did it. I’m glad I have more likes and a custom tab. And, if I hadn’t, I wouldn’t be able to write this article or give advice on the topic.
Now, if you already have at least 2,000 likes then there really is no reason not to add a welcome tab. You might as well take every opportunity you can to get social followers on your website and list.
But, if you don’t have the social followers this is not a high priority item. I’m glad I have more than 2,000 likes now but it really doesn’t move the needle for my business. It’s more of a vanity metric than anything else.
Out of those 2,000 people, only 10-30 of them see each of my posts organically. If I want more of my audience to see my posts I have to pay Facebook to boost them.
Additionally, while it’s great that I have a custom welcome tab now, the tab is not ideal and has low visibility. It doesn’t appear at all on mobile, it’s only on the desktop version. Because of that, it’s only possible for a small percentage of my followers to ever see it. And, it will never be the first thing people see. You can’t replace the default Facebook home tab. People have to choose to click on another tab. Because of these restrictions it just doesn’t get very much visibility.
So, if you already have enough followers, then yes, you might as well add it. If you don’t, there are better ways to spend your time and money.
Do you have a custom Facebook tab? What content do you display on it and does it convert well? Let us know in the comments!
Do you want to listen to this article? Here’s the podcast episode: