When you’re building a blog, one critical component is having a plan to grow your newsletter subscribers. Allowing readers to subscribe gives you a direct line of communication with your audience. Think of your blog as a megaphone to reach people, while your newsletter lets those interested individuals connect with you on a deeper level. The goal is to turn casual readers into devoted fans. Here’s how to make that happen and grow your newsletter subscribers along the way.
Do you want to watch this article? Here’s the video episode:
Write About What Your Audience Cares About
Before you can start converting readers into subscribers, you need to attract the right audience by creating content they genuinely care about. This starts with clearly understanding your target reader by creating a marketing persona – visualizing one fictional reader and outlining details about their personality, demographics, needs, and pain points.
With a well-defined persona in mind, conduct keyword research to identify relevant phrases. Analyze keywords to find terms that have decent search volume but aren’t overly competitive. Focus on specific, niche keywords that your future readers would find valuable, but where there’s an opportunity to stand out from the crowd.
With your keywords in hand, plan your content using a content calendar, and prioritize creating high-quality articles over sheer quantity. If an article is taking longer than expected, don’t be afraid to extend your schedule. It’s better to spend the time needed to craft a truly excellent piece of content that will resonate with your intended audience.
Writing content your audience cares about involves several steps, each with its own in-depth process. Here’s a recap of the steps involved, with links to more detailed guides if you want to dive deeper:
To turn readers into subscribers, you need to offer an incentive – often called a “lead magnet” – that provides immediate value in exchange for their email address. Popular options include e-books, discounts, online courses, white papers, cheat sheets, or exclusive content.
The right lead magnet depends on your blog’s topic and your target audience. Think about the hurdle or roadblock preventing new readers from ultimately achieving your primary goal, whether that’s making a purchase, generating affiliate referrals, or something else. Then, create a lead magnet that helps bridge that gap and moves readers closer to your end goal.
For example, here on the ClearPath Online blog, the ultimate aim is for you to sign up for digital marketing coaching to grow your blog’s audience. A common hurdle for new readers is a lack of confidence in their ability to do SEO themselves. To bridge this gap, the lead magnet offered is a free course on how to do SEO yourself. It allows readers to gain confidence in their SEO skills and determine if coaching would be a good fit for their needs. This lead magnet helps move readers closer to the primary goal of signing up for coaching.
Optimize Subscription Forms
To increase the chances of readers subscribing, reduce friction by minimizing form fields to only what’s absolutely essential – ideally just an email address field. Lengthy forms with several fields can be intimidating and cause people to abandon the process before completing it.
In addition to minimizing form fields, make sure your subscription forms are visually appealing and easy to spot. Use contrasting colors that grab attention and clear call-to-action text so readers know exactly what to do. The design should be clean and uncluttered. Consider using graphics, images or illustrations related to your lead magnet to further draw the eye. Your forms should look like a natural part of your site’s branding and content flow. With an optimized form design, you’ll increase the chances of catching your readers’ interest and having them complete the subscription process.
You’ll also want to place your lead magnet’s subscription form in multiple locations, wherever it makes the most sense and relevance for the reader’s experience. A common approach is to include it in your website’s footer area, so it’s easily accessible after someone finishes reading an article. However, don’t be afraid to also embed forms inline within articles when the surrounding content is highly relevant to your incentive offer.
Share Across Multiple Channels
While having your lead magnet prominently featured on your blog is crucial, don’t stop there. Leverage the incentive by promoting it across other channels and platforms you’re active on, such as YouTube, Instagram, Facebook groups or pages, podcasts, and more. Whenever you’re discussing a topic related to your incentive, mention its availability.
The key is to use those external channels to drive traffic back to your website and blog, where you have maximum control over the user experience.
Be Cautious with Exit Intent Pop-Ups
One popular tactic for boosting lead magnet conversions is the use of exit intent pop-ups – those boxes that appear when your cursor moves toward the browser’s URL bar, as if you’re about to leave the site. While effective, these pop-ups can also be quite annoying to some users.
Carefully consider whether exit intent pop-ups truly align with your audience’s preferences and expectations. In some cases, it may be better to prioritize quality over quantity when it comes to your subscriber numbers. Having fewer but more engaged, genuinely interested subscribers could be more valuable than inflating your list with people who were coerced into signing up.
Summary
Growing your newsletter subscribers begins with creating content tailored to your target audience’s interests and offering value-packed incentives. However, that’s just the start. To retain those hard-earned subscribers and turn them into devoted fans, you must continue delivering high-quality, relevant content on a consistent basis.
Always keep your readers’ needs and perspectives at the forefront as you explore and implement strategies to grow your blog. Prioritize quality over quantity in both your content and subscriber acquisition tactics. Focus on the right engagement methods for your particular audience, rather than techniques that may not align with their preferences. And never lose sight of your ultimate goals – whether it’s product sales, affiliate marketing, or something else entirely.
Consistently serving up valuable content and incentives tailored specifically for your audience will keep subscribers engaged and positioned to eventually take your desired actions. With the right balance of quality, relevance and subscriber nurturing, you can successfully grow your newsletter and turn casual readers into loyal followers.
Do you want to listen to this article? Here’s the podcast episode:
Previously, we explored the decision of whether your blog should use a brand name or your personal name. If you are leaning towards using a branded blog name instead of your personal name, you likely still have questions. You may be asking: what should I name my blog? Here’s a guide on how to choose the perfect blog name.
Do you want to watch this article? Here’s the video episode:
Criteria for a Perfect Blog Name
When choosing a name for your blog, keep the following tips in mind.
Relevance
It’s important that the blog name relates to the content you intend to cover. The name doesn’t need to exactly describe your blog’s topic, but it should be relevant. It’s okay to be creative, but avoid confusing your audience with an unrelated name.
You also want to keep the future growth of your blog in mind. While the name should relate to your initial topic, make sure it’s broad enough to accommodate any potential expansion of topics down the road.
Memorability
Make sure your blog name is easy for people to remember, both in written and spoken form. Is it simple to say, type, and remember when mentioned casually? Choose a domain name that follows conventions, such as using a familiar extension like .com, as they tend to be more memorable. Avoid using unusual characters like hyphens or underscores.
Uniqueness
Try to choose a brand name that stands out from the crowd. This offers multiple advantages–it’s easier to secure the domain name and social media handles, it’s likely more memorable, and it can be easier to improve search visibility and brand marketing.
Conciseness
Opt for a brand name that is short and concise. A shorter name is easier to remember and to share with people. Securing short domain names can be challenging and expensive, but if you have multiple options, lean towards the shorter name.
Availability
Verify the brand name is available, as both a domain name and across social media platforms you plan to use. If the name is already taken, consider choosing something different to avoid confusion. This could be confusing both for your target audience and search engines.
Don’t Focus Solely on SEO
Avoid choosing a name strictly for SEO purposes. In the past, there was a trend where people would purchase domain names containing their primary keyphrase with hyphens separating each word. This tactic doesn’t improve your search ranking; it only leads to confusion and a lack of memorability for your target audience. For instance, a blog focused on dog training shouldn’t be named something like “dog-training-tips-online.com” just for SEO.
Brainstorm Options
The most effective way to choose a brand name is to start a list with all of your ideas. Continue adding to the list and refining it. Over time, a clear winner will emerge–a name that consistently stands out and grows on you, signaling that you found a winner.
Leverage AI
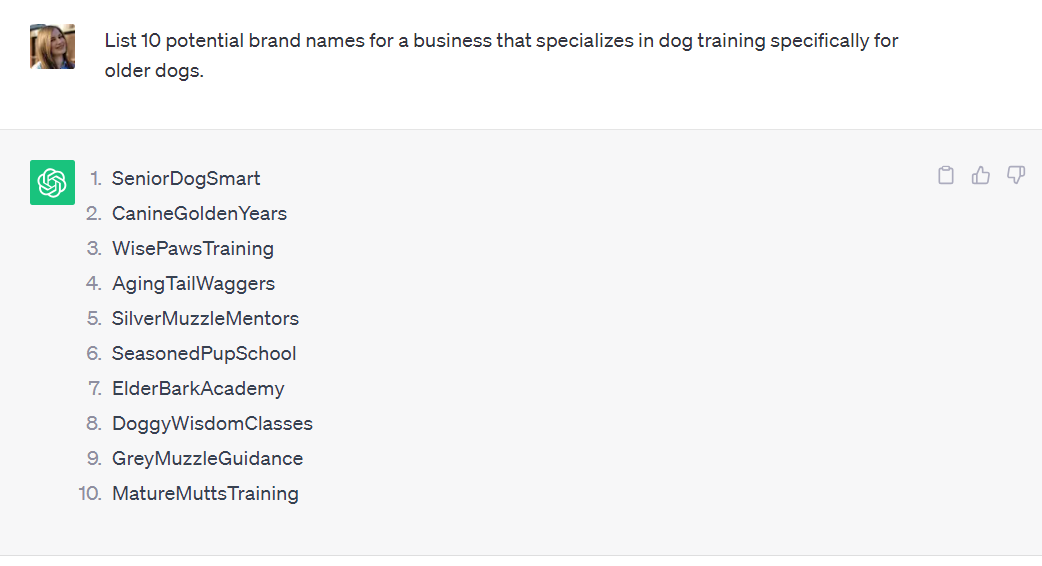
If your brainstorming list is empty and you need help generating ideas, consider using AI. Use a prompt like the following with AI assistants like ChatGPT, Google Gemini, or Microsoft Copilot:
List 10 potential brand names for a business specializing in: [insert your blog topic]
You can view the results I got when searching for brand name ideas for a blog that creates content on training older dogs.
These are the results from ChatGPT:
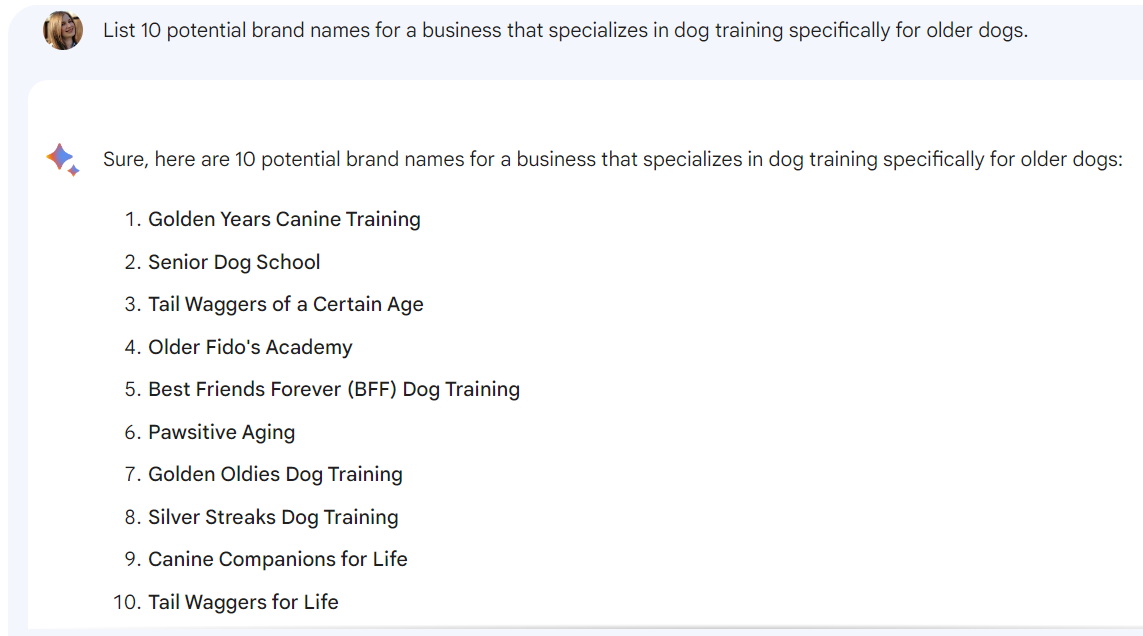
These are the results from Google Gemini:
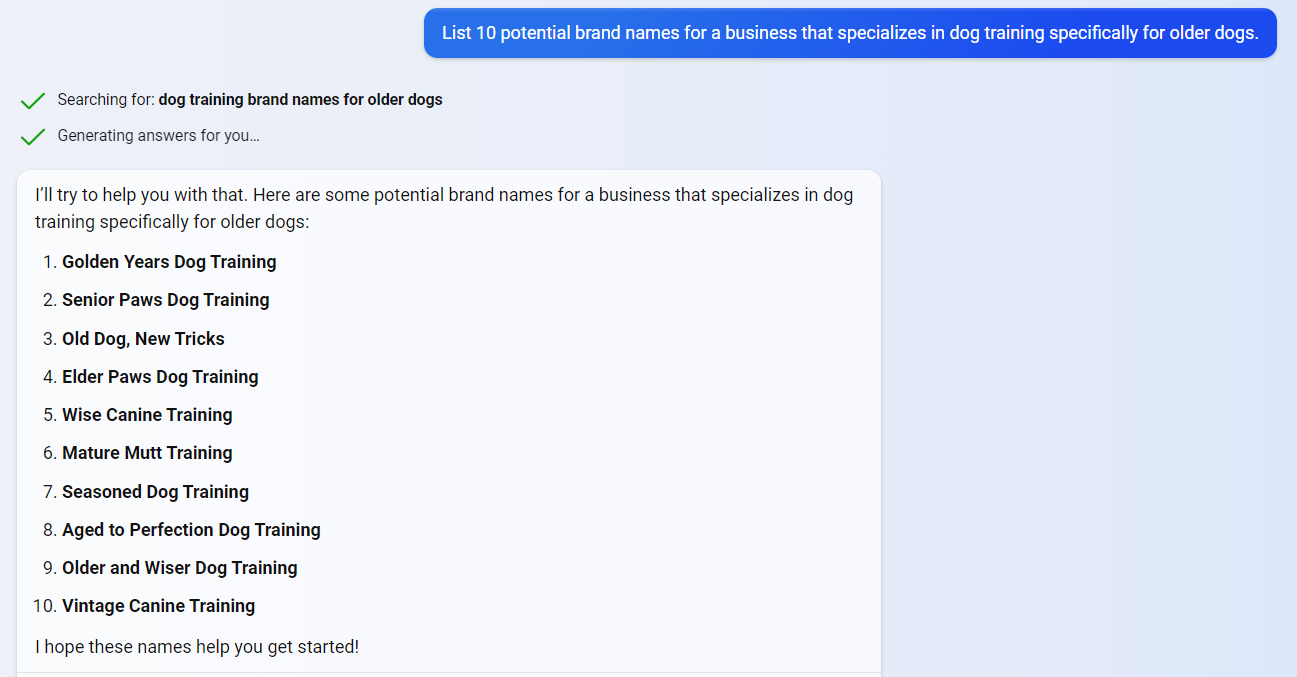
These are the results from Microsoft Copilot:
Seek Input from Others
Once you have a few favorite brand names, gather opinions from friends and family. If you know anyone in your target audience, their input would be extremely useful. Otherwise, you can get opinions from people in your life to determine which brand name resonates most with your blog’s purpose.
In Summary
The perfect name may take time, but putting in the effort ensures your blog starts off on the right foot. Brainstorm as many options as possible, aiming for relevance, memorability, uniqueness, conciseness, and availability. If you’re still undecided, don’t hesitate to seek input and votes from others. Once you make a decision, commit to it and move forward. Whatever name you choose will be great–now it’s time to start creating content.
Do you want to listen to this article? Here’s the podcast episode:
Deciding whether to start a blog can feel daunting. It can be hard to feel confident that there are people who want to learn from your journey. But the truth is, we all have a unique perspective shaped by our experiences, knowledge, and passions. If you feel called to explore a topic you care deeply about, then blogging provides an incredibly empowering outlet to potentially change lives – both your own and those in your future community. Here are five reasons why you should become a blogger.
Do you want to watch this article? Here’s the video episode:
Guide Others with Your Experience
Blogging revolves around the act of sharing. Regardless of whether your blog is about a hobby you enjoy or your professional expertise, you are sharing your knowledge. It’s common to experience imposter syndrome and doubt if you have the necessary expertise to create a blog on your chosen subject. The key is realizing that you don’t have to be the world’s foremost expert; you simply need to be a step ahead of someone else. In fact, not having mastered the topic completely can make it easier for people to connect with you, as they’ll feel like they’re on the learning journey with you. Just be transparent about where you are in your journey, and you’ll attract the people who value what you have to say.
When we started blogging about our travel trailer adventures, it began as just a project to document our journey primarily for family. However, as we shared our beginner’s perspective and lessons learned along the way, we quickly attracted a wider audience of fellow RV enthusiasts. Even though we were new to owning a trailer ourselves, people appreciated our relatable experiences and were eager to learn.
We started creating videos to answer common questions from the community on topics like our solar setup, leveling the rig, and our favorite gear. Despite being far from experts, our authentic, first-hand knowledge resonated in a way that professional advice sometimes lacks. To our surprise, that channel has continued rapidly growing and now brings in hundreds of dollars each month through affiliate programs – simply by generously sharing our RV experiences.
Build a Like-Minded Community
Don’t underestimate the power of bringing people together. As Helen Keller once said, “Alone, we can do so little; together, we can do so much.” A community provides support, motivation, and valuable connections with people in similar situations to our own. We can be stronger in a community.
When you create a topical blog focused on a specific subject, you naturally attract a group of people who share that interest. As your audience grows, you’re nurturing a community of like-minded individuals. Your blog will attract and grow a community.
Within this community, people will contribute through comments. As time goes on you’ll notice that others start to assist and answer questions, reducing the burden on you. Building a community of people genuinely interested in helping others is immensely rewarding, and the resulting conversations are a lot of fun.
Generate Income
There are many ways to make money with a blog, such as affiliate marketing and online courses. Generating income is a common goal for many bloggers. You likely won’t be making any money the first 6 months but if you have a monetization plan you can make a few hundred dollars a month within the first two years and have the potential to make thousands of dollars a month if you continue to grow the blog.
Not only is generating income a goal for financial improvement but also as a measure of the impact the blog is having on people’s lives. If people are purchasing from you, it signifies that you’ve created authentic content, built trust, and fostered a community. This is a positive sign, both for your wallet and the influence your website is having.
Improve Your Writing Skills
Even if your blog isn’t immediately profitable, you still benefit personally from the experience. The process of consistently crafting blog content will gradually refine your writing skills. Blogging regularly provides consistent writing practice and your readers will provide feedback to help you hone your communication skills over time. The feedback may not be direct but by monitoring Google Analytics you can see what content is viewed and what content gets ignored. It’s amazing how much your writing abilities can improve through the act of creating content regularly.
Acquire New Knowledge
Another personal benefit of maintaining a blog is the opportunity to acquire new knowledge. After writing a few articles, you’ll find that many topics require research. This process allows you to dive deeper into your blog’s subject matter, which is likely something you’re already passionate about. The research process helps to fill knowledge gaps and encourages continuous learning in your field of interest.
Additionally, as you create your blog, you’ll acquire various skills, especially if this is your first blog. From setting up the blog to publishing articles and engaging with your community, it’s a continuous learning journey. If you decide to repurpose your blog content into podcast episodes or YouTube videos, even more learning opportunities await.
In Summary
Becoming a blogger can have a profoundly positive impact on both your life and the lives of your community members. Your unique story is worth sharing, and there are people out there who need to hear it. By making a difference in someone else’s life, you simultaneously make a difference in your own. So if you’re still debating starting a blog, this is your sign that you should get started today.
Do you want to listen to this article? Here’s the podcast episode:
Did you know multitasking actually reduces productivity? A study done by the American Psychological Association found that multitasking can reduce productivity up to 40%. When you batch tasks together it allows you to focus attention on one type of activity at a time, leading to more efficient work habits. And the increase in efficiency makes it even easier to create consistent content, which is essential for a successful blog. That is why the best way to stay on top of your blog is to batch content creation. We will go over a step-by-step guide on how to batch blog content to boost productivity and efficiency.
Do you want to watch this article? Here’s the video episode:
1. Brainstorm Ideas
Before diving into batching content, you need a pool of ideas. The best approach to generating ideas is by conducting keyword research. This not only provides ideas but also ensures that your content aligns with your target audience. If you’re unsure how to perform keyword research, check out our keyword research guide to get started.
2. Content Calendar
Once you have your content ideas, it’s time to create a plan. And there’s no better way to organize your content efforts than by creating a content calendar. A content calendar is essentially a schedule that dictates when each article will be published. It will be your roadmap for organizing your batch content creation process.
Feel free to plan your content calendar as far in advance as you like. I like to make a quarterly plan on my content calendar. However, while a quarter makes sense when coming up with content for the calendar, it may be too many articles to batch during content creation.
For the batch size, don’t get too carried away. Start in smaller chunks and gradually increase as you become accustomed to it. Begin by batching three to five articles. If you create weekly posts, start by batching one month of content. Then adjust as needed.
3. Write Articles
With your content ideas and calendar in place, it’s time to start creating your articles. It’s often most efficient to focus on one article at a time. Begin with the first article in your batch. Create an outline, write a rough draft of the content, and then edit it. Repeat this process for each article in your current batch.
4. Add Visuals
Once you’ve written your articles, it’s time to enhance them with visuals and relevant media. Go through each article individually and determine where images, graphics, or charts can improve the content.
5. Schedule Posts
Now it’s time to schedule your articles using your content management system (CMS). This will vary depending on your system. Below are the steps for scheduling content in WordPress:
Go to Posts > Add New
Input your article content
On the right-hand side next to “Publish,” click “Immediately”
Select the date and time for the post to go live in the menu that appears
Once a future date is selected, the “Publish” button at the top will change to “Schedule”
Click “Schedule” when you are finished
6. Repurpose Content
While the priority is creating blog content, you can also repurpose this content for various platforms, expanding its reach and impact. Consider the following options:
Convert your article into a podcast episode: Reach audiences who prefer audio content and tap into podcast platforms to broaden your reach.
Create a video summarizing its main points for YouTube: Engage visual learners and leverage the popularity of video content on YouTube to attract new viewers.
Highlight content in an Instagram Reel or YouTube Short: Capitalize on short-form video trends to deliver quick, digestible content to your audience.
Use the Instagram carousel feature to build a mini-course: Provide value-packed, educational content in a visually appealing format, ideal for Instagram users seeking in-depth knowledge.
By repurposing your blog content into these additional media types, you can significantly enhance its value and reach. Many people prefer consuming content in video or audio formats, making these repurposed versions highly valuable. After preparing the repurposed content, schedule it to go live either on the same day as your blog article or further into the future.
7. Post Publish Routine
After your article is live, there are additional steps to optimize visibility. We have a comprehensive post publish routine to follow that includes actions like optimizing internal linking, sharing with your followers, and embedding repurposed forms of media in the page such as a YouTube version of the article.
8. Utilize ClearPath Online
To streamline your blog content management, consider leveraging ClearPath Online. The ClearPath Online platform combines digital marketing coaching with an interactive digital marketing planner. It is designed to help boost your blog audience, while making it easier to stay on top of your content strategy.
In Summary
Many bloggers have found great success in batching content, including Amy Porterfield. She not only batches content, she now does what she refers to as “Mega Batching.”
I wanted to mega batch our podcast. That means we would batch the podcast ideas and then we would batch our outlines for our podcasts. We would then batch my podcast recordings and then we would batch the writing that goes into each podcast, the show notes, the emails, social media, and all that good stuff. We would batch that as well. This is not just batching but mega batching.
Amy Porterfield in episode 182 of the Online Marketing Made Easy Podcast
Batching blog content is the key to maintaining consistency and freeing up time for other projects. By batching your content, you can complete more in one sitting, allowing you to dedicate your remaining time to business growth. Conversely, creating new content every week can feel like treading water. Batching content is the strategy that empowers you to get ahead so it’s possible to focus on projects beyond content creation.
Do you want to listen to this article? Here’s the podcast episode:
Writing a blog doesn’t have to be a daunting task. When I first started it would take me days. Now it typically takes under an hour to write a blog article. Having a system in place helps speed up the process substantially. I’ll outline how to write blog posts faster and more effectively by repeating a simple blog writing process.
Know Your Target Keyword
The first step to writing a blog article is performing keyword research. Now keyword research is a huge topic alone and if you need details on how to do that refer to our complete keyword research guide.
This step is critical because it confirms that the time you are spending to write a blog post is well spent because your audience is looking for that content.
There are times when you might write an article that is so unique and specific to your journey or your audience that a keyword wouldn’t be applicable. In those cases, you don’t need a shortcut to write a blog faster. Those stories almost write themselves because they are personalized stories you are sharing. It’s fine to share posts like that from time to time but if your goal is to grow your audience then make sure the majority of your content is keyword focused.
Create an Outline
Once you know the topic of your blog, start building an outline. Create a list with all of the items you’d like to mention in your article.
Once you jot down all of your talking points you can start organizing them. I like to do this with a bulleted list. Start rearranging and adding some structure to your ideas so the conversation will have a flow that’s easy to understand.
Look at the Top 10 Search Results
After you’ve written down all of your existing ideas and thoughts you want to mention, it’s time to take a look at what’s ranking currently.
Go to Google and search for the keyword you are targeting. Look at the top ten results that currently rank for that term. There are two things you want to look for while doing this.
First, make sure that the subject matches what you had in mind. If the results are completely different from the article you plan to write, in a way that’s so drastically different that the person looking at these results would never have any interest in your article, then you need to find a new keyword.
Search for a few other similar keywords until you start to find the right content for the article you have in mind. This doesn’t happen too often but every once in a while the language we use to describe something is vastly different than the general population and because of that the search results for that term are not as useful as we had hoped.
Once you are certain you are focused on the correct keyword, take a look at the results. Actually click through and take a look at the top ten search results. Scan through the subheadings on each article to get a good understanding about which topics are covered.
As you’re looking at the subheadings on the top ranking articles it will likely trigger more ideas for your own article. Go ahead and add those ideas to your outline. Remember not to copy the ideas though. The subheadings will act as idea starters and often remind you of topics you had wanted to include, but forgot about while creating your original outline. I make sure to never read the details on the top ranked blogs because I don’t want to accidentally word my article the same way as another.
I simply scroll through quickly glancing at headings to make sure I haven’t forgotten any talking points. I also take a look at visuals so I can get an understanding of what I need to do to stand out and improve on the top ranked pages.
Finalize the Structure in Your Outline
After reviewing the top ranked sites and adding any last minute ideas to your outline, make sure the outline is well organized. The outline should be in a bulleted list. The main bullets will be your subheadings. The secondary bullets will end up being your paragraphs and talking points.
Write the Intro
Once you have a clear outline write your introduction paragraph to give the reader an idea of what they will learn in the article. Make sure to include your keyword in the intro paragraph and give the reader a clear idea of what to expect.
Write the Article Body Using the Outline
After the introduction you’ll start writing the body of the article. To do this you’ll follow the outline you have created. Use the outline to remind yourself of the concept and then write about it.
Don’t worry about the grammar, that can be fixed later. Just take it one piece at a time and write whatever comes to mind. When you finish writing about that one topic, scroll back to the outline to remember what comes next. Continue writing about the next point and so on until you are at the end of the outline.
Write a Summary
After you’ve covered everything included in the outline, write a summary or conclusion paragraph. The goal of that paragraph is to summarize what was discussed in the article.
Once the summary is complete the blog article rough draft is done.
Edit the Blog Post
Once you have a rough draft finished, read through it in its entirety. Make sure it flows properly. Read through it at least once with no other goal than making sure it is coherent and all sounds good together.
After that, go back through the article to fix any grammar and spelling issues and do a more formal editing process.
Summary
Creating repeatable routines and writing often is the best way to speed up blog content creation. If you follow this process to create keyword focused content in an organized manner it will not only save you time but the article itself will be more effective and rank higher in search engines because it is created to answer questions people are looking for.
Do you want to listen to this article? Here’s the podcast episode:
About six months ago I got one of those ideas that wouldn’t go away. Instead, it continued to grow. The idea was to share what we’ve learned about camping off-grid in a micro trailer. After one year of ditching the tent and camping in the trailer, we knew we had a new obsession. Camping has been completely changed for the better. And my husband and I have a new habit of always trying to improve both our trailer and our camping routines.
We got to the point where we felt like we had information worth sharing with other families interested in doing the same thing, camping off-grid in a micro trailer and making lasting family memories. We wanted to both share the knowledge and preserve the memories. And we decided YouTube was the best place to do that.
Six months ago, we created our YouTube channel and we have been posting content every single week. We thought we’d go over what we’ve done with the channel, what we’ve learned, and how much money we’ve made with it. That way we can give you an idea if having a YouTube channel would make sense for you.
Creating a Plan for Our YouTube Channel
We knew from the beginning that we needed to have a clear plan for our channel and not create content at random. We first decided which types of videos we would be creating. We came up with three different categories.
First, we would create videos of our camping trips. These videos would have no voiceover but instead show what a trip could look like if you decide to visit that campground. These videos are meant both as family keepsakes and to give a clear idea of what that particular campsite and campground look like. For details about the location and to add extra value it was decided that each of those videos would also have a corresponding campground review blog article that discusses the good and the bad.
Next, we would create educational content. These videos would all have one specific theme and would include footage of one of us speaking. We would mix in video footage of camp trips to help illustrate our point, but the goal of these videos is to help people either with the trailer, camping off-grid, or camping with a family.
And finally, we would create content showing our camping recipes. Specifically we would focus on cooking on the Blackstone while camping. Our trailer came with a Blackstone, and we would never camp without a Blackstone now, so it felt like content that was important to include. It was also content that we were having issues finding on our own on YouTube so we thought it would be good to create it.
In addition to the YouTube channel we knew we also wanted to start a blog. Each video would have a corresponding blog article. The plan was to create the blog off of a modified version of the video transcript. Using the transcript would save us time but we knew it would need to be reviewed and altered slightly to make sense for a blog post.
And lastly, to grow our blog we planned to leverage the ClearPath Online DIY SEO Tool and follow the SEO tasks provided there to grow website traffic and help gain an audience.
Leveraging Affiliate Marketing
We knew many of our videos would highlight particular products. So we decided early on it would make sense to do some affiliate marketing. Affiliate marketing is when you partner with retailers and receive a personalized way to link to products so the experience is the same for the user but the retailer can identify the referrer and give a small fee for the referral without increasing the price to the user.
Affiliate marketing made sense because it was a win-win. Highlighting products without linking to the exact item is a pain. Adding the exact link is a benefit and convenience for the viewer. And if we generate sales it makes sense we would earn a small commission if it comes at no extra cost to our viewer.
Even though we do have many affiliate marketing links our number one goal is to help the viewer. So there are still times we add a link to a product even though we don’t get any monetary value from the link. Providing accurate information in a convenient format is more important than earning a small affiliate referral fee.
And we only ever recommend products we’ve used and tested. It’s not worth getting an affiliate commission for a product we haven’t tested. It’s more important to be a trustworthy source.
How Much We’ve Earned From 6 Months of Affiliate Marketing
We have signed up for two different affiliate accounts. We’re using Amazon and Battle Born. So far we’ve only made money from Amazon but that makes sense. Battle Born is where we purchased the equipment for our solar upgrade and that’s a project that takes months of research before you’re ready to commit. So I expect that to be a longer funnel.
To be honest, I added Amazon affiliate links because I thought it made sense. It seemed like a good idea since I was already recommending the products. I didn’t have any expectations so I was thrilled when it started making anything.
The first two months we made nothing. The third month we made just slightly under twenty dollars. The fourth month we made over forty dollars. And the fifth month we made one hundred and ten dollars. The sixth month hasn’t been calculated by Amazon yet.
So far I have been very happy with the income from affiliate marketing. I don’t expect this to be a steady stream of income, but anything we get is a welcome bonus.
Monetizing on YouTube
We are hoping to be able to monetize on YouTube so we can get a cut of the ads that already play on our videos. YouTube has some metrics you need to meet before you can monetize your channel. We need 1,000 subscribers and 4,000 watch hours. Right now we are at 143 subscribers and 1,654 watch hours.
So, we have a long way to go with subscribers but I’m very happy with our watch hours. I thought that would be the more difficult metric to reach. Although we are already six months in and not even halfway on either of these metrics I’m still hoping we will reach these goals within one year of posting weekly content. So that gives us six more months. They are picking up some momentum so I don’t anticipate the next six months to go at the same speed as the first, I expect us to keep growing.
As long as we keep posting weekly content our numbers should continue to climb. Since there is more content available to be consumed there are more opportunities to gain watch hours and subscribers.
Growing Our Website
Having a blog and a web presence was an important piece for us. We use the videos as our primary content and create the text based on the video transcript. This makes the project much easier to tackle so we can focus on creating high-quality videos.
We started with a completely new website. We didn’t own the domain before, we started at ground zero with absolutely no visitors. After six months we now have over 300 monthly visitors and it’s growing each month. About 80% of the traffic comes from Google search results. The rest comes from social accounts (including YouTube) and direct traffic.
The Costs Involved with Our YouTube Channel
So far the costs involved have been very minimal. We intentionally tried to start with what we have and not invest a bunch of money from the very beginning. We wanted to see if this was something we were interested in continuing with and get a better idea of the gear we needed before we started spending money.
Camera Cost
Of course one of the most important parts of creating a YouTube channel is having a camera. All we’ve used so far is the camera built into our phones. Now, this is good and bad.
When we started my phone was actually broken. It had died for no apparent reason and a new version of the phone was about to be released. Instead of buying the current (about to be outdated) version I decided to wait. In the meantime, I borrowed a phone. While it was a nice phone (and I was grateful to have it) the camera was not as nice as my old phone. There was a moment where I told myself I couldn’t start the channel until I got my new phone.
I luckily have a husband who reminded me that was a bad mindset and I shouldn’t let something like that stop me. So I didn’t. I now have a nicer phone but the quality is still far from perfect.
What I’ve learned though is having my phone available for recording is a big reason why I’m able to make these videos. It’s convenient and I always have it. If I upgrade to a standalone camera the quality will likely improve but the content will likely decline. Anything other than my phone wouldn’t constantly be with me so it would be more difficult to capture all of the content I’d like to include.
So, my camera cost has been nothing because I use whatever phone I own as my primary camera. It is possible this would change in the future or we may add a camera such as a GoPro for extra footage. But right now this seems to be a benefit so it’s easy to capture the content that’s important to me.
Hosting Cost
Another possible cost is hosting. YouTube is free and doesn’t cost anything to host videos. But, if you start a blog as well there is a hosting cost involved. We already have a host we pay for monthly so this was not an added cost to us. But, if you need a host you can use Bluehost which is as low as five dollars per month.
(Disclosure: The Bluehost link is an affiliate link. By purchasing through that link you help support ClearPath Online at no additional cost to yourself.)
Transcripts Cost
Transcripts are very helpful both to add captions to the YouTube videos and to use as content for blog articles. For the majority of the transcripts I’ve listened to the video and typed them all out myself. This route is completely free but very time consuming. Depending on the video it would sometimes take me three hours to complete a transcript. I started realizing this is a bad use of my time.
For my more recent videos I used Rev.com. They have an option to have the transcripts computer generated instead of having the work done by an actual person. This route is extremely cheap, only twenty-five cents per minute. I gave this a try and while it wasn’t perfect, it saved me several hours for each video.
I had four videos transcribed for under ten dollars using Rev. I plan to continue using their service going forward. It was money well spent for all the time I saved.
Editing Cost
Since I edit the videos myself there isn’t a cost for an editor. I happen to already own the software I use for editing as well so that was another cost I was able to save. The software I use is called Camtasia. The software costs $300 but it is a one-time fee.
Where I did need to spend some money for editing was buying music. Camtasia did come with some music that works well for background tracks. But, once I used all of those tracks I didn’t want to repeat the same songs. I wanted a larger library. I only use music for our campground videos but if they all had the same songs it would be very boring.
So I started using Artlist for background music. It’s only $16 per month and it makes the process of finding music super simple. There are several search options that you can use to filter the results including the mood of the song and if there are vocals or just instrumental. It makes the editing process much faster when finding the right song isn’t a huge challenge.
Our Future Plans for Our YouTube Channel
We are six months into our YouTube channel and we’re having a ton of fun with it. We definitely plan to continue creating content and growing our channel.
Our primary goal for the channel is to be able to monetize it through YouTube. We also plan to grow it to the point where we can open an Amazon store which provides higher commission rates than the standard Amazon affiliate program.
And if the channel continues to grow we will use any profit it generates to upgrade our equipment. Eventually we would like to get a GoPro and start focusing on high quality video and audio.
Summary
So that’s where we are after six months of weekly YouTube content. The videos are getting easier and faster to edit. We are having a ton of fun. And we are even starting to make some money. If you’re interested in checking out our videos you can find them at RoginaRoaming.com.
We plan to do a follow up to this article in another six months. At that point we will have an entire year of weekly YouTube content. My hope is I’ll be able to tell you we have monetized with YouTube. Either way though I’ll provide an update on our progress and let you know how things are going.
Do you want to listen to this article? Here’s the podcast episode:
The Bing Webmaster Tools are one of the few tools you want to setup on your website from the beginning. They are packed with insights, data, and tools that you can use to improve your website. And the data begins that day it’s setup, so even if you aren’t ready for it yet, start collecting the data. Here’s how to setup Bing Webmaster Tools.
Are the Bing Webmaster Tools Worth Using?
Before we go over how to setup Bing Webmaster Tools, let’s discuss if it’s even worth using. The short answer is: yes! First of all, it’s free, so why not? Second, for all of the same reasons you setup Google Search Console on your site, you’ll want to setup Bing Webmaster Tools as well. These tools provide feedback directly from the search engines! The only thing better than getting feedback on your site straight from a search engine, is getting feedback from two search engines! Just because you get the majority of your organic search traffic from Google, doesn’t mean you should ignore Bing.
If that isn’t enough to convince you, the Bing Webmaster Tools are packed with features you won’t find in the Google Search Console. It has a keyword research tool, allows you to run a site scan to identify SEO issues, and even offers free conversion optimization tools such as heatmaps and session recordings with Microsoft Clarity.
Setting up Bing Webmaster Tools
Before you start, make sure you setup Google Analytics and then setup Google Search Console. These installs build on each other. Google Search Console is easiest to setup when Google Analytics has already been configured. Similarly, Bing Webmaster Tools is easiest to setup when Google Search Console has already been setup.
So, before you install Bing Webmaster Tools, setup Google Analytics and then Google Search Console. Now you’re ready to setup Bing Webmaster Tools.
Google provides a free tool for website owners to see potential issues and gain insights not available in Google Analytics. It’s called the Google Search Console. We’re going to walk through how to setup Google Search Console on your website.
Why Should You Use Google Search Console?
Before we discuss how to setup Google Search Console, let’s discuss why you should. Or maybe the real question is: why wouldn’t you use Google Search Console? The Google Search Console contains data and utilities meant to increase your website traffic and visibility on Google. This information is coming directly from Google. That same search engine that you are working hard to rank on. So, why wouldn’t you listen to the personalized advice they are offering your website?
The Search Console is what Google uses to communicate issues and errors to website owners and administrators. This is the tool Google uses to contact you and give you free advice, just take some time to listen and maybe you’ll see some search improvements.
What’s the Difference Between Google Search Console and Google Webmaster Tools?
Google Search Console was previously named Google Webmaster Tools. You may still see references to the old name around the internet, they are really interchangeable. Google Search Console and Google Webmaster Tools are the same thing, but Google Search Console is the new and current name.
Setting up Google Search Console
Setting up Google Search Console for your website is pretty straightforward. Before you start, make sure you’ve already setup Google Analytics. That makes the process super simple. Then, follow these steps:
Click Start Now and login to your Google account. (Make sure it’s the same Google account you used for your website’s Google Analytics account.)
Under URL Prefix enter in your website URL and click Continue.
You can enter the URL under Domain instead. This is preferred because it allows you to set it up once and see all variations of the domain (https, www, etc.) but it requires DNS verification. The other method allows you to verify with several different methods including Google Analytics. If adding a DNS record isn’t a problem for you then go that route. If you want the easiest possible set up though then just stick with URL Prefix. You’ll have to set it up multiple times to see data from every variation of the URL but setup is super simple and is finished in seconds.
You’ll need to verify your website. If you have Google Analytics setup, and you chose URL Prefix, then using Google Analytics to verify is the easiest option. Otherwise, you can choose HTML file upload or HTML tag and follow the prompts to verify within minutes.
Unless you choose the Domain configuration instead of URL Prefix, you’ll want to repeat this process for both the www and non-www versions of your website. If you use https, then those versions should also be added for both https and http. Which means there would be a total of four site variations added to Google Search Console. Google sees all of these versions as separate sites and adding them all to Google Search Console will give you full visibility. Seeing data for all of them will allow you to verify everything is configured properly.
When you add a new web property, Google will send you a message outlining some steps you can take to improve the search presence of your website. Go through those steps and implement the ones that make sense for your web property. They include items such as adding all website variations and adding a sitemap.
Check Your Google Search Console Monthly
Setting up the Google Search Console is only the first step. It won’t do you much good if you never look at it. Try to login monthly to confirm there are no issues.
When you first start the account you may find several issues and recommended improvements. Invest the time to get those cleaned up. Once you get the initial issues taken care the monthly checks won’t take long.
If you need help staying on top of the different tasks you need to perform within the Google Search Console you can leverage the ClearPath Online DIY SEO Tool. It’s prepopulated with prioritized digital marketing tasks, including everything you need to monitor within the Google Search Console. And it’s already set up to stagger them out so you have a short list each day based on your personal digital marketing needs.
Do you want to listen to this article? Here’s the podcast episode:
When you're building a blog, one critical component is having a plan to grow your newsletter subscribers. The goal is to turn casual readers into devoted fans. Here's how to make that happen and grow your newsletter subscribers along the way.Read More
Blogging provides an incredibly empowering outlet to potentially change lives - both your own and those in your future community. Here are five reasons why you should become a blogger.Read More
ENROLLMENT NOW OPEN! Register for the free How To Do SEO Yourself online course.